At the end of the year, the year-end and year-end peace is the wish of each of us. In everyday life, electricity safety is a commonplace topic. Switches and sockets are commonly used electrical accessories in our daily lives. The safety and durability of these devices are of great concern to us. Only the installation of qualified switches and sockets can ensure the convenience and safety of home electricity. In this issue, Xiaobian will introduce to you in detail the matters concerning the installation of switch sockets and so on.
A, switch socket installation preparation
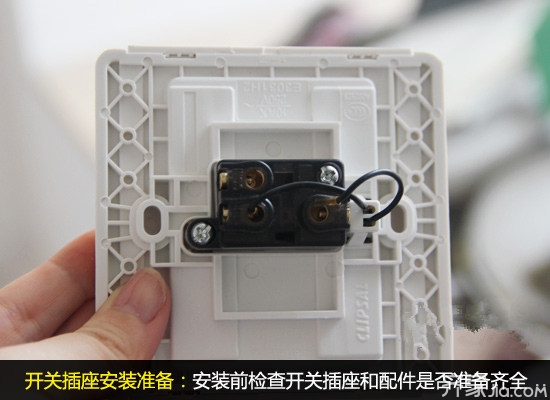
1, switch sockets and accessories ready
Before installation, it is necessary to check whether the switch socket product is a regular brand product. It is better to check the authenticity of the product. Also need to see whether the product installation accessories are ready, such as metal expansion bolts, plastic expansion tubes, galvanized screws and so on.
2, installation tool preparation
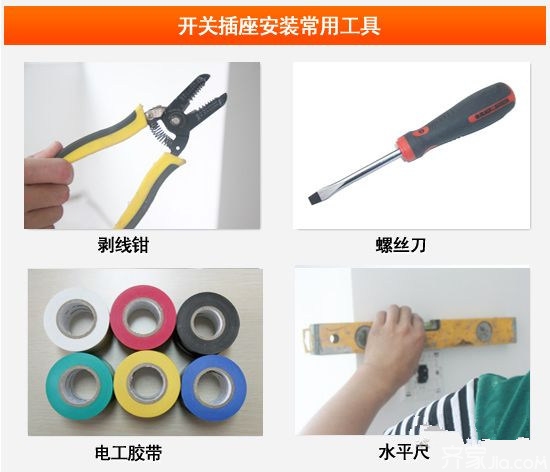
Before installation, special installation tools, such as a ruler or wire sinker for measuring the position and height, etc., electric drills for drilling, and test pencils, insulating gloves, wire strippers, and the like used for installation are also required.
3, installation conditions
The installation of switch sockets needs to meet certain operating conditions. It is required that the renovation of walls, paintings, and wallpapers be completed before completion of the renovation work. And the circuit pipelines and boxes have been laid and insulation telemetry has been completed. During the operation, the weather is clear and the house is dry and ventilated. The power supply to the electric box is cut off.
Second, the switch socket installation process
The installation process of ordinary switch sockets is relatively simple and takes a short time. Generally, an electrician can install all the switch sockets in a home within one day. The installation procedure of the switch socket is generally three steps of cleaning, wiring and fixing.
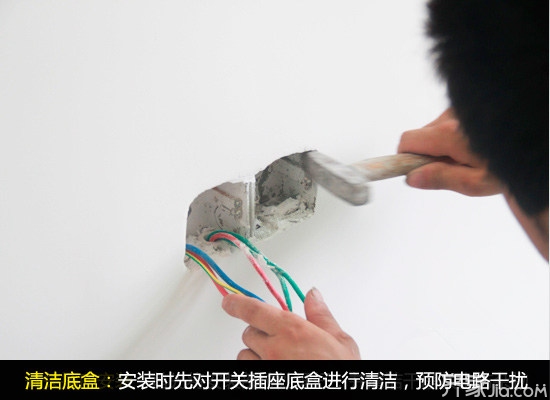
1, clean the bottom box
The switch socket is installed after the wood painter and the like, and the bottom box that is placed for a long time is inevitably piled up with a lot of dust. During the installation, the switch socket bottom box is cleaned first, in particular, the dust and impurities in the box are cleaned, and the remaining dust in the box is wiped with a damp cloth. This will prevent special impurities from affecting the use of the circuit.
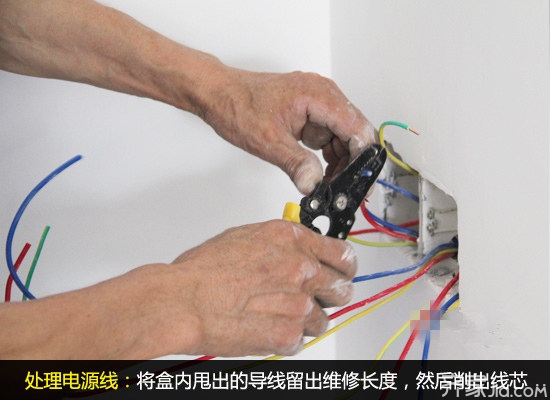
2, connect the power cord
Leave the wires thrown out of the box for the length of service, and then cut out the core, taking care not to injure the wire core. Wind the wire in a clockwise direction around the corresponding terminal of the switch or socket, then tighten the pressure head, and the wire core must not be exposed.
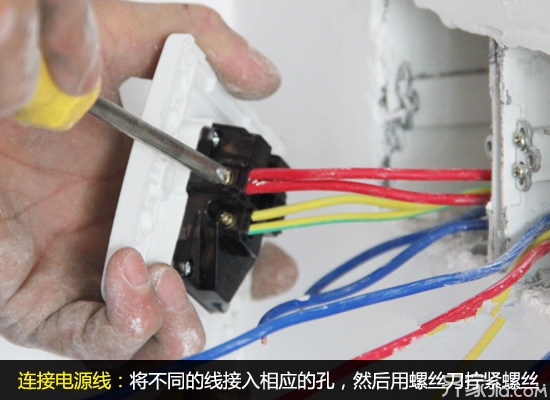
In general, different products have different wiring methods. The general switch socket products will come with the product installation instructions. The installation needs to be installed according to the instructions. The most basic requirement is that FireWire (L), Neutral (N) and Ground (E) cannot be connected incorrectly. When wiring, connect different wires to the corresponding switch socket holes and tighten the screws with a screwdriver.
3, fixed
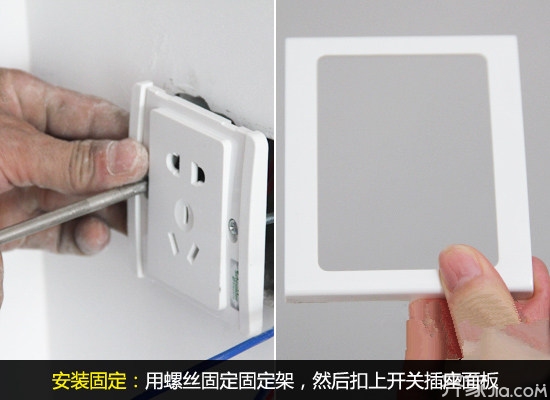
After connecting the power cord, place the switch socket in the installation position, align it with a level ruler, and fix it with screws. Finally cover the decorative panel.
Switch Socket Switch Socket Optional Switch Socket Install Switch Socket Brand
Dimple Cuspated Drainage Geocomposite (alternate name,composite drainage sheeting,geocomposite dranage mat,etc) is manufactured from high density polyethylene heat bonded to polyester or Polypropylene Nonwoven Geotextile fabric available in one single configuration.It is an air-gap membrane with a Geotextile cloth on one side,which provides a drainage path,with the function of drainage and filteration.It can be used for civil engineering projects such as retaining walls,landscaping drainage,parking decks,etc and mostly used for basement walls,tunnels drainage.

Introduction:
green roof drainage board is manufactured from High Density Polyethylene resins. Produced by extruding plastic sheet into dimple shape.These dimples,in spatial structure with certain height. Can resist long-term high pressure without deformation. On the top of the dimples, there is filtration geotextile to make sure the drainage channel ruing well without any block for any articles. For example,filling particles or concrete.
Property:
low-cost, high efficiency; durable; chemical resistance, resistance to puncture of plant roots; diverse application; simple installation and quality guaranteed.
Application:
1, Landscape engineering: garage top greening, roof garden, football field, golf course, beach project.
2, Municipal engineering: road base, subway, tunnel, landfill.
3, Construction engineering : upper or bottom layer of building foundation, basement wall, bedding filtration and heat insulation.
4, Traffic engineering: highway, railway basement, dam and slope.
Specification:

Composite Drainage Sheet(board)
Composite Drainage Sheet,Drainage Sheet With Geotextile,Plastic Drainage Board,Composite Drainage Board
Shandong Tianhai New Materials Engineering Co., Ltd , https://www.chinatinhy.com